If you have kids or are living with a few roommates, nothing can be more annoying than to have to flush your toilet twice every time you use it. If you ever forget to do it twice, then be prepared to be reminded of the nightmarish incident for the rest of your life :-/. Today we will answer the question why do you have to flush your toilet twice.
Why do you have to flush your toilet twice? The most likely cause for this is that there is insufficient water in the tank due to the float being in the wrong position. For this reason, the toilet will be unable to get rid of the waste in a single flush. You would have to adjust the float to its proper position to allow more water to get filled in the tank.
There are other reasons of course but this is the most common one. To know more about this issue and other issues, we need to explore how the toilet works as a whole and the various ways to ensure it is well maintained.
Why do you have to flush your toilet twice?
There could be many reasons why your toilet requires you to flush twice every time you use it. Here are some of them:
- Type of flush toilet – If you have a low flush toilet, the chances are you will be experiencing the above issue regularly. This is because low flush toilets are made to save water and therefore store less water than other types of toilet. Good quality ones might do the job but cheap or low-quality ones will always have this issue. To resolve it, you will have to replace your existing toilet with a new one.
- The flapper – A toilet flapper is a part that drains the water from the tank allowing it to flow freely into the bowl. While flappers work properly when the toilet is new, sometimes they can get worn down or crack over time. When this happens, the water will keep leaking into the bowl so that when you flush, very less water will be released from the tank. If you ever face this issue, you can just replace the flapper with a new one by calling your plumber.
- Clogged Rim Holes – Sometimes the rim holes in your toilet may get clogged from mineral deposits. In such cases, you can mix bleach and water (1:10 ratio) and pour the solution directly into the overflow tube inside the toilet tank. Wait for at least five minutes before flushing the toilet. Then you can inspect the rim holes and clean any buildup with a piece of wire but make sure you wear gloves when you do so. Once it is cleared, make and pour one more solution of bleach and water and wait for five minutes before flushing.
- Clogged pipes – This one is different from the rest as it affects the pipes. Sometimes the pipes can get clogged due to which a single flush may not be enough to get rid of the waste. Dental floss, sanitary items and various other miscellaneous items can cause clogging in the pipes. Therefore, it is very important to ensure that you don’t flush such items in your toilet.
- Hard water – Hard water is filled with chemicals that cause build up over time. It is notorious for clogging pipes over time and does the same when it comes to the toilet bowl. The buildup can severely limit the amount of water that can flow from the tank to the bowl and make you flush twice or thrice every time you use the toilet. One way to solve this issue is through regular maintenance and cleaning. The more permanent way would be to install a water softener.
How does a toilet work?
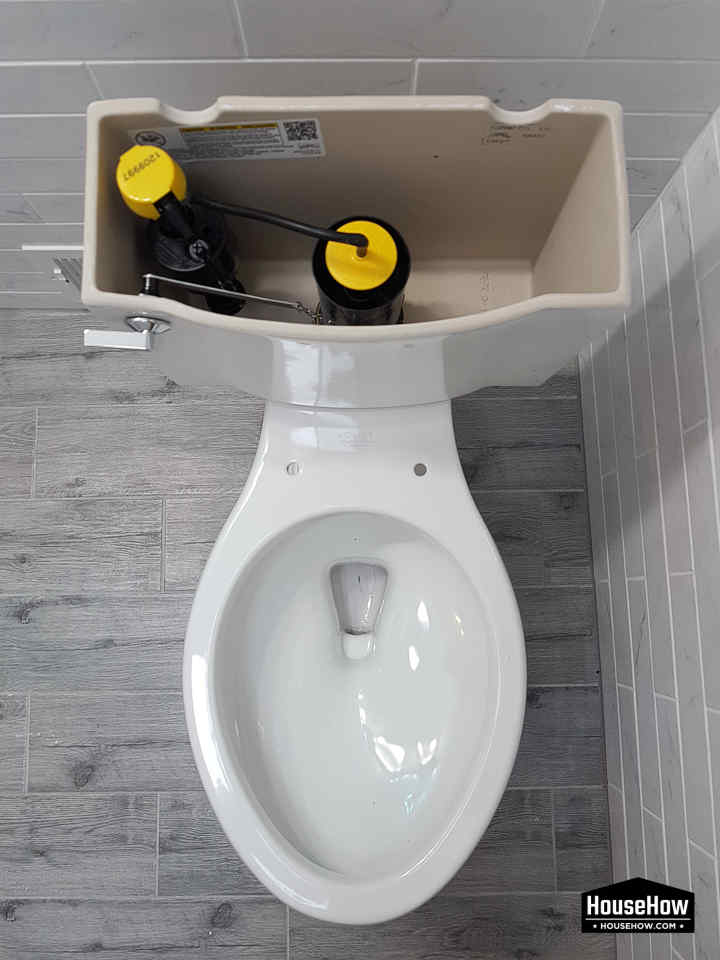
A toilet utilizes a very simple mechanism to get rid of waste. It does so with the help of two main components which are the tank and the bowl. Water is stored in the tank at all times and when you flush your toilet, the flapper inside opens it up so that the water can flow down to the bowl and get rid of any waste. The tank consists of a fill valve, a fill tube, a float and a flapper and each one has a unique purpose. If any of these parts become defective, you will start facing issues with your toilet.
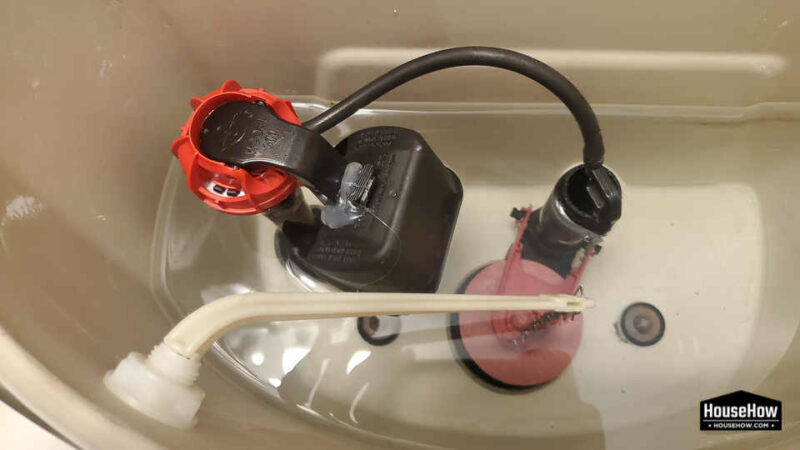
The fill valve is responsible for refilling the tank with the help of the fill tube after flushing. The water will keep getting filled in the tank until it reaches the set level. The level is determined by the float. Ideally, you should never change the position of the float as any change will result in water either filling up too much or not getting filled enough. In some toilets, the level is determined by the valve itself.
How to make the toilet flush stronger?
Apart from the obvious option of replacing your toilet, there are a few ways in which you can make the toilet flush stronger. This is mostly for toilets that are have been in use for a long time. If your toilet is new and has a weak flush, then it most probably is either by design or has a defective part. If you notice that your existing toilet is not working as well as before, then you can try the below steps.
- Clean the rim holes and any buildup inside the tank. To clean any build-up, you will need to shut off the water supply and flush the existing water away. Then you can easily get rid of any deposit on the walls, float or near the flapper.
- The slack in the chain connected to the flapper should not be more than a quarter inch. Also, see if the chain is vertical and not slanted.
- Check the float to see if the water level is proper. In most cases, if the float is placed too low, you will see a big reduction in the power of the toilet flush.
- If you notice that water is leaking into the bowl consistently, contact a plumber to fix the leak and replace any damaged parts.
Converting toilet to a power flush system
A power flush toilet is specifically designed to use water and compressed air to push the water with high pressure when flushed. While you can’t convert all toilets to a power flush one, some models allow you to do so. Before you do anything, it is very important to find out if your toilet will be compatible with the change or not. If it is, here is how you can convert it to a power flush system:
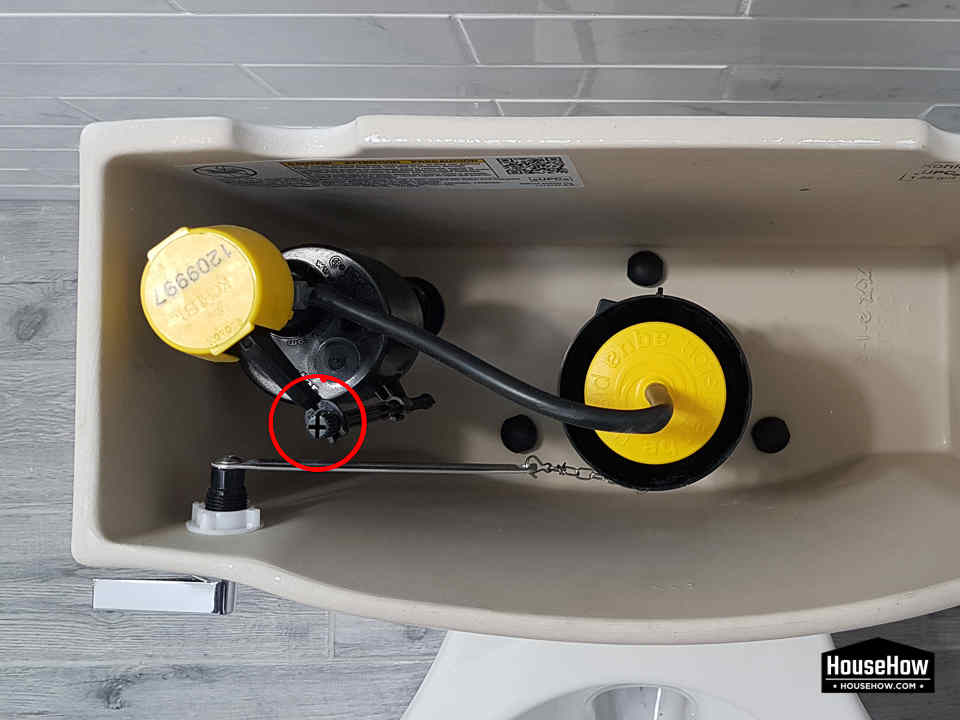
- Turn off the water supply to the tank and drain the existing water by flushing it. Use a wrench to unscrew the nut that attaches the water supply line to the toilet.
- Remove the parts inside by unscrewing the nuts and fittings of the flushing device and flapper with your fingers.
- Remove the arm that opens the flapper.
- Now you need to take your power flush conversion kit and remove the bladder.
- Take the cylinder from the bladder by unscrewing it and lifting it. Keep it next to you as you will need it later.
- Now you have to hold the bladder over the tank so that you can insert the threaded part of the water line that hangs from it through the hole where the water supply line connects to the bottom of the toilet.
- Then lower the bladder and fit it into the hole at the bottom of the toilet.
- Take the cylinder you had kept aside earlier and put it back into the bladder. Make sure you rotate it counterclockwise while screwing it in until you hear a click.
- You will see two divots on the top of the cylinder. Use a pliers to tighten the cylinder at the divots by turning it clockwise.
- Remove the arm from the power flush kit and attach one end to the flush valve inside the tank. The other end has to be attached to the cylinder’s top by lifting the spring-loaded arm at the top and inserting it under it.
Once everything is done, you can screw back the water supply line to the bottom of the toilet and put the lid on top of the tank. Flush it to see the change. It is important to note that the above steps should be done only if you are experienced with plumbing. If you are not confident about your skills, it would be wiser and cost-effective to hire a professional.
How to fix buildup inside the toilet tank?
In a lot of cases, a toilet flush becomes weaker due to the use of hard water. You can alleviate the issue by following the below steps:
- Use a soap additive made specifically for bathroom fixtures to clean any soap scum inside the tank. It doesn’t happen often but if it does, this is a good way to get it cleaned.
- You can also spray distilled white vinegar inside the tank and leave it overnight. Make sure all the water in the tank is emptied though and that the water supply to the tank is turned off. Then the following day, you can use fine sandpaper to clean any build-up. Turn the water supply back on and flush to finish the cleaning process.
- If you are willing to make a small investment, the best way to get rid of mineral deposit build-up is to install a water softener. If you are planning to replace your toilet or buy a new one, you can also go for ones that come with a water softener feature.
- Lower the water temperature if you can to reduce both scale and mineral deposit build-up.
Related questions
How do I get more water in my toilet bowl?
The water level in the toilet bowl is a great sign to know if there are any issues. If the water level in the bowl is too much, then it points to a possible blockage somewhere in the pipes. If it’s too low, then it might be either due to a clogging issue, incorrect float placement or blockage in the plumbing vents. To get the right level, you can check for the above-mentioned issues and resolve them. When it comes to the position of the float, see if the water level is approximately 1 or 2 inches below the fill valve. If not, adjust the float accordingly and the problem should be resolved.
Can I convert my toilet to a power flush system?
Yes, you can but it might not work with all the models. It won’t be as effective as a power flush toilet but it will be more than enough for regular usage. Before you start removing parts inside the tank and installing new ones, it would be advisable to contact a plumber and see if it can be done. Some toilets won’t allow you to install different parts retroactively so you need to be sure you have a compatible toilet before attempting to change the water pressure.
How much water should be in a toilet bowl?
In most cases, you should already be having the right water level in the toilet bowl as long as the float inside the tank is in the correct position. One way to determine this is to check if the water level inside the tank is 1 or 2 inches below the fill valve and the overflow tube. It’s a bit difficult to know the ideal level of the water in the bowl but if it is higher than the outlet hole by 2 inches, you don’t need to worry about it. If it doesn’t cover the outlet hole or if it rises more than 3 or 4 inches, then you need to get it fixed as soon as possible.
Related community topics
If you have any other questions that are not answered in this article, you can ask them on our Home Improvement Community Forum by clicking on this link.

